How to Cut Down a Tree With a Chainsaw

How to Cut Down a Tree With a Chainsaw
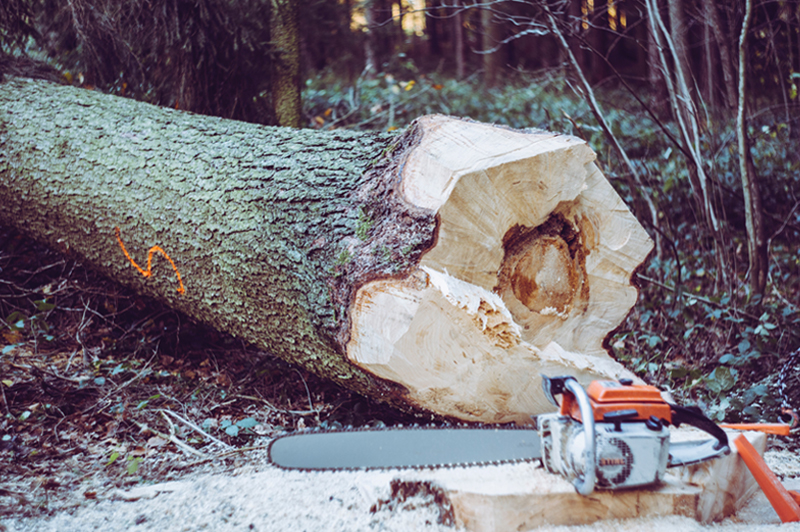
Please Note: At Precision Tree Care and Removal, we are experts at tree removal. No two jobs are alike, and we have years of experience cutting thousands of trees across all sorts of situations. The following article provides the basic steps for cutting down a tree with a chainsaw. However, it is important to note that tree removal can be extremely dangerous work. If you are in doubt, or if the tree is large, near a home or other structure, or for a tree you want to fell opposite of its lean, it is always best to call in a professional. Of course you won’t find a better, safer, or more friendly crew in the Live Oak, FL area than Precision Tree Care & Removal! The following are the basic steps to cut down a tree with a chainsaw. Remember, cutting down a tree with a chainsaw is hard work. The chainsaw makes it easier, but much manual work is still involved. Additionally this is hazardous work. Planning and patience are key. Follow these steps carefully and patiently and you can successfully cut down that tree! PREPARE FOR THE CUT Good preparation is the key to a safe and effective job.- Ensure your equipment is up to the task. Make sure you are familiar with your chainsaw, and have read and understand all safety manuals. Make sure that your chainsaw is in good repair and has been properly maintained.
- Personal Protective Equipment (PPE). You may think that the more experienced you are, the less you need to worry about PPE. Wrong! Just because your pilot has flown hundreds or thousands of times, you wouldn’t want him to neglect going through his ore-flight safety checklist before taking off with you or your loved ones on board. Similarly, you are never too experienced to wear the appropriate PPE. Here are some items you may need:
- Gloves
- Facemask
- Ear protection
- Hard hat/helmet
- Chaps
- Proper fitting clothing
- Appropriate footwear
- (Other items could be needed depending on the job)
- Examine the area. Ensure there are no people, pets, power lines or structures within a radius equal to the height of the tree. In other words, if the tree were to fall in any given direction, if the height of the tree could reach any of the valuable things listed above, you should not tackle the project yourself.
- Plan the fall. Choose the desired direction you want the tree to fall. This should usually be the direction the tree naturally leans. If the natural lean is not the desired direction for the fall, please call a professional.
- Plan your escape path. Your escape route should be opposite of the direction of the fall and at a 45-degree angle. Make sure this path is free of obstructions and tripping hazards.
- Clear the area. Clear the area around the tree and make sure that if there are any loose branches overhead, that they are removed prior to proceeding.
- Create your fell notch. With your left shoulder against the tree, begin by making a cut a few feet from the ground, at the approximate height you want the tree to “hinge” duringh the fall. Now cut from top to bottom at 70-degree anogle to a depth of approxmiately 25% of the width of the tree on the side matching the direction you want the tree to fall, using the felling sight on the top of the saw as your guide.
- Make a second cut horizontally to meet the depth of your first cut. This will create a triangular “notch” in the side of the tree matching the direction you want it to fall.
- For the felling cut, you will go to the opposite side of the tree from your notch and make a horizontal cut slightly above the bottom of the notch cut. Saw until you have enough room to insert a wedge into the cut. Tap the wedge into the cut.
- Resume cutting through the tree being very careful not the hit the wedge with your saw.
- Rather than cutting clear through to the wedge, cut until about 10% of the tree width remains. This 10% of the width will serve as a “hinge” to allow the tree to fall in the safest manner.
- When the tree begins to fall, move away down your planned escape path which was opposite the fall direction at a 45-degree angle. Moving away quickly opens the possibility for injury. As you move away quickly, be careful with your chainsaw, and that any of your other PPE doesn’t turn into a hazard.
- With the tree on the ground, work your way up from the base to carefully remove the limbs from the tree.
- Cut limbs from the top and sides of the felled tree. For limbs under the felled tree, only remove those that you have easy access to and are not under tension, or supporting the tree. Limbs that are supporting the tree can be removed later.
- Remember: the larger the limb, the heavier it is, and therefore the greater the tension. To safely remove larger limbs, begin cutting sections of the limb at points farther from the trunk. Removing in sections reduces the weight and leads to less tension, which leads to safer cuts.
- Identify aeas of the trunk that are not on the ground. These areas are much more likely to compress (cause binding on your blade) when cut. Pro Tip: Cut 30% of the way through a side of the trunk where compression or binding may occur, then cut a 1-inch offset cut from the other side through the trunk to keep the blade from binding. This will give you more control. You can also use a wedge to hold a gap that is subject to compression and binding.
- For areas of the trunk that are lying directly on the ground, use your chainsaw to cut most of the way through. Then roll the log over and finish the cut. This will prevent hitting the ground with your saw.
- Identify areas where the log is leaning upwards, supported on one side. For these areas, begin the cut from the bottom on the non-supported side, then finish the cut from the top.
- Cut the trunk into manageable sizes that you can carry and stack away from the work area.